L. Storioni Violin - 1786 Model
I have received a number of questions relating to the Work In Progress pictures of the Storioni Violin. Rather than answering each question individually, I have attempted to discuss various parts of the making process that incorporate all the questions asked so far.
Components of the Violin:
2 x Front quarter sawn spruce boards
2 x Back quarter sawn maple boards
(Quarter sawn refers to the process of cutting segments out of the log like slices of cake,
so that the growth rings run at approx. 90 degrees to the main surfaces).
6 x Maple strips (ribs)
6 x Spruce blocks
12 x Spruce linings
1 x Maple neck and scroll
1 x Spruce bass bar
36 x Purfling (12 lengths of veneer - maple between two strips of ebony)
3 x Ebony fingerboard, nut and saddle
6 x Rosewood pegs, tailpiece and endpin
1 x Maple bridge
1 x Spruce sound post
4 x Ebony back pins, saddle crown and bottom rib fillet
81 pieces in total
Linings:
As the ribs of a violin are only about 1mm thick, a small strip of wood is glued on their internal edges to provide a thicker glueing area. These are the linings and are usually made of willow or spruce. Fig. 2 shows them with the ribs; Fig. 4 shows them being glued in place with little spring clamps; Figs. 14 onwards show them shaped and finished. They are usually let into the blocks on the 'C' bouts to avoid any possibility of them springing away from the ribs. It is also considered that the linings provide significant strength to the body of the violin.
Tools:
Experience has taught me to both conserve personal energy and protect my hands. Over the years I have devised a number of power assisted methods for removing the bulk of the wood from my instruments, leaving me with only a few millimetres to work and finish. Violin fronts and backs are finished to basic thicknesses (more graduated on the backs), which are then individually tuned. I mark out these thicknesses and then set the depth stop on my drill press to accommodate a 'lip and spur' drill bit over a leather covered pillar.
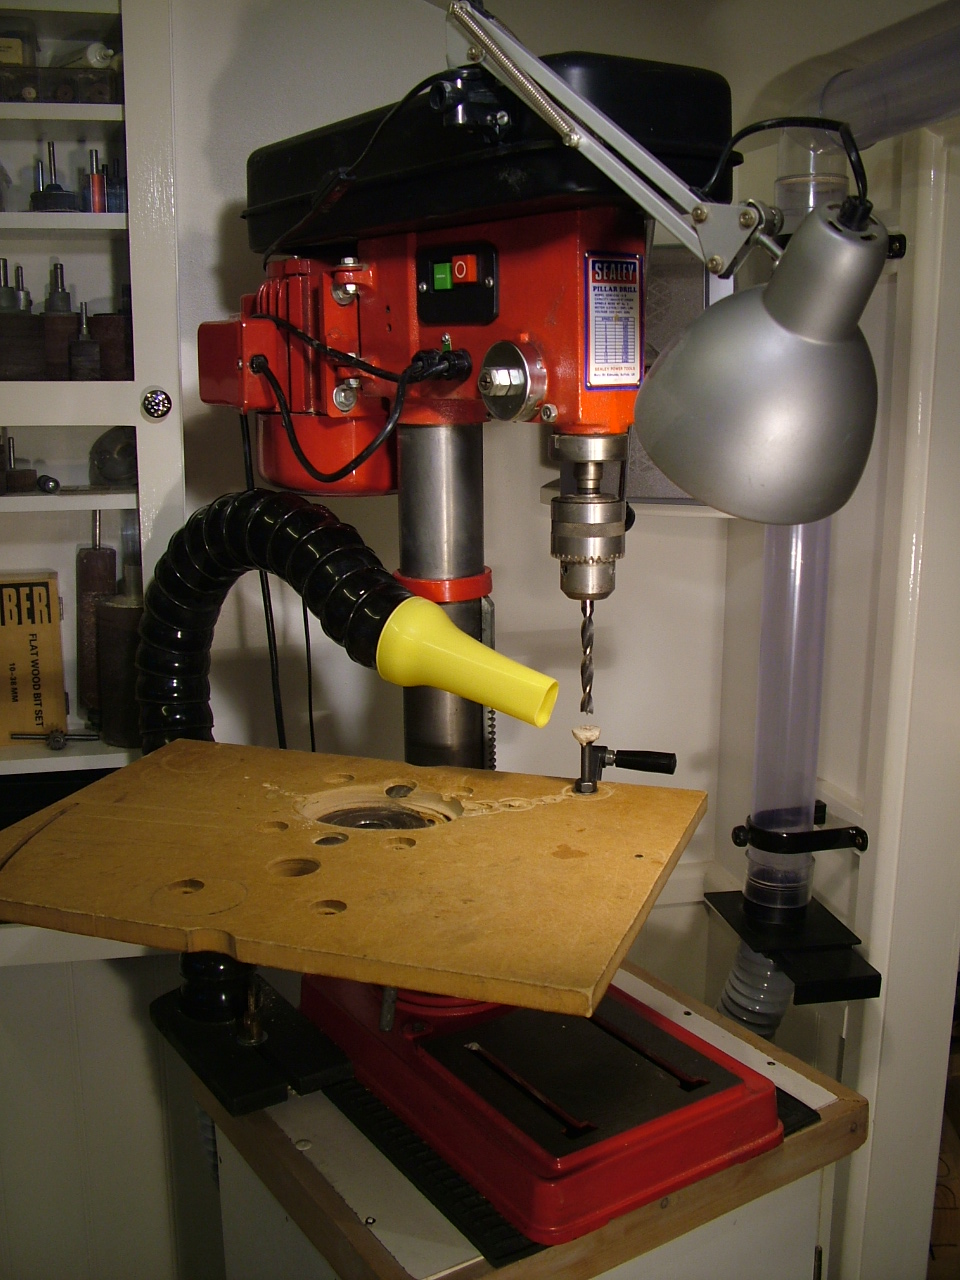
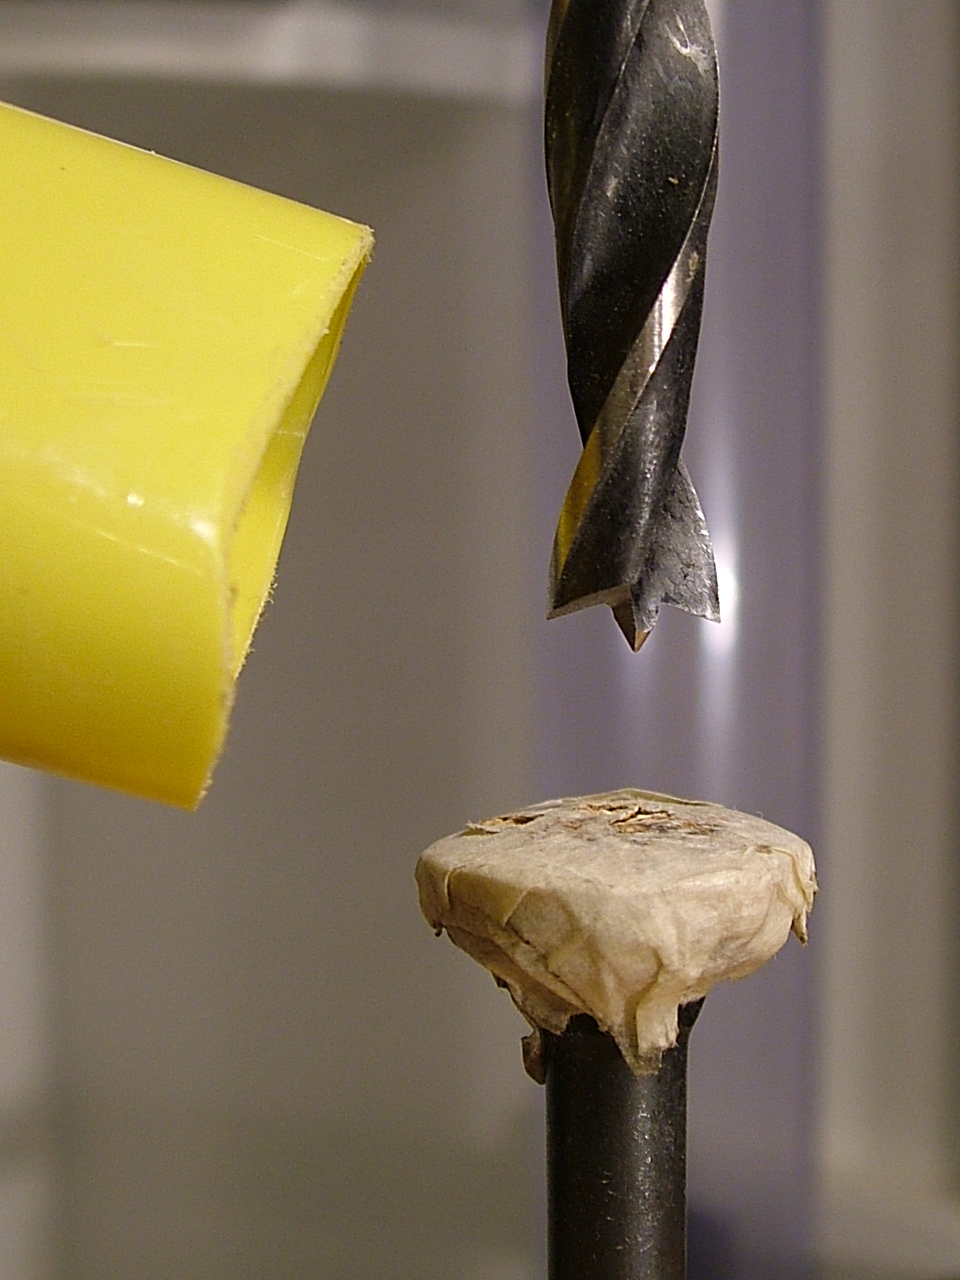
Once drilled, these holes give me an accurate guide for machining out the bulk of the wood. The 'worm holes' on Figs. 10 and 11 are the marks left by the spur that tell me when to stop. I then continue to remove the wood with a set of little thumb planes (Fig. 7 onwards). The circles. lines and numbers are guide marks to help achieve the final thicknesses. Normally, scrapers are held and powered by the fingers which can cause a lot of joint pain and so I am learning to use a wonderful set of palm scrapers also illustrated. The 'bottle brush' and yellow ring (Fig. 221 are a rotary rasp and dust extractor used to rough out the neck and heel.
Calipers:
Most of the instruments I make are not 'bench copies' but rather modern stylistic impressions of the originals. I have a reasonably comprehensive library of photographs, drawings and plaster casts collected by myself and colleagues over many years. I prefer to work from these when I can. Sometimes I may be asked to make a model by a specific maker that differs from my own archive. In this case I work from other photographs, but use my own collection to try to understand the personaility of the maker. This instrument was such a case.
Most old instruments suffer from a degree of plate distortion caused by pressure on the bridge, sound post etc. When I make a modern copy I have to average this out. I start by copying the cross archings using a tile guage (the red, comb-like tool), but I leave the whole thing quite full. I then try to flow the curves out evenly in the manner of the maker, checking against photographs. The calipers (Fig. 9) consist of a graphite point that can be set at a given distance from a hemispherical guide. This allows me to draw contour lines on the plate and acts to disclose asymetry etc.
Bass Bar:
The piece of wood running down the inside of the front (Fig. 20 onwards) is the bass bar. One of its functions is to support the bass foot of the bridge. It also has an enormously significant effect on sound. It is made of spruce, with its grain running parallel to that of the front. Its precise angle, inclination, position, length, thickness and contour are critical. I use chalk (which I clean off prior to glueing) to achieve a precise fit.
Peg Holes:
The peg holes are all of the same taper, but of slightly different diameters to allow for symetry of peg length as the peg box narrows. The holes are also laid out asymetrically in profile to avoid strings running over adjacent pegs. The tools illustrated are tapered reamers which cut the peg holes. The pegs are shaped in a giant pencil sharpener.
I prefer fine shanks on my pegs. The smaller diameter assists tuning, reduces friction and maintains the strength of the peg box. In the future, when the pegs need replacing due to wear and tear, it will also avoid the need for immediate bushing of the peg holes.
I hope that this covers everything and thank you for your interest - Ian
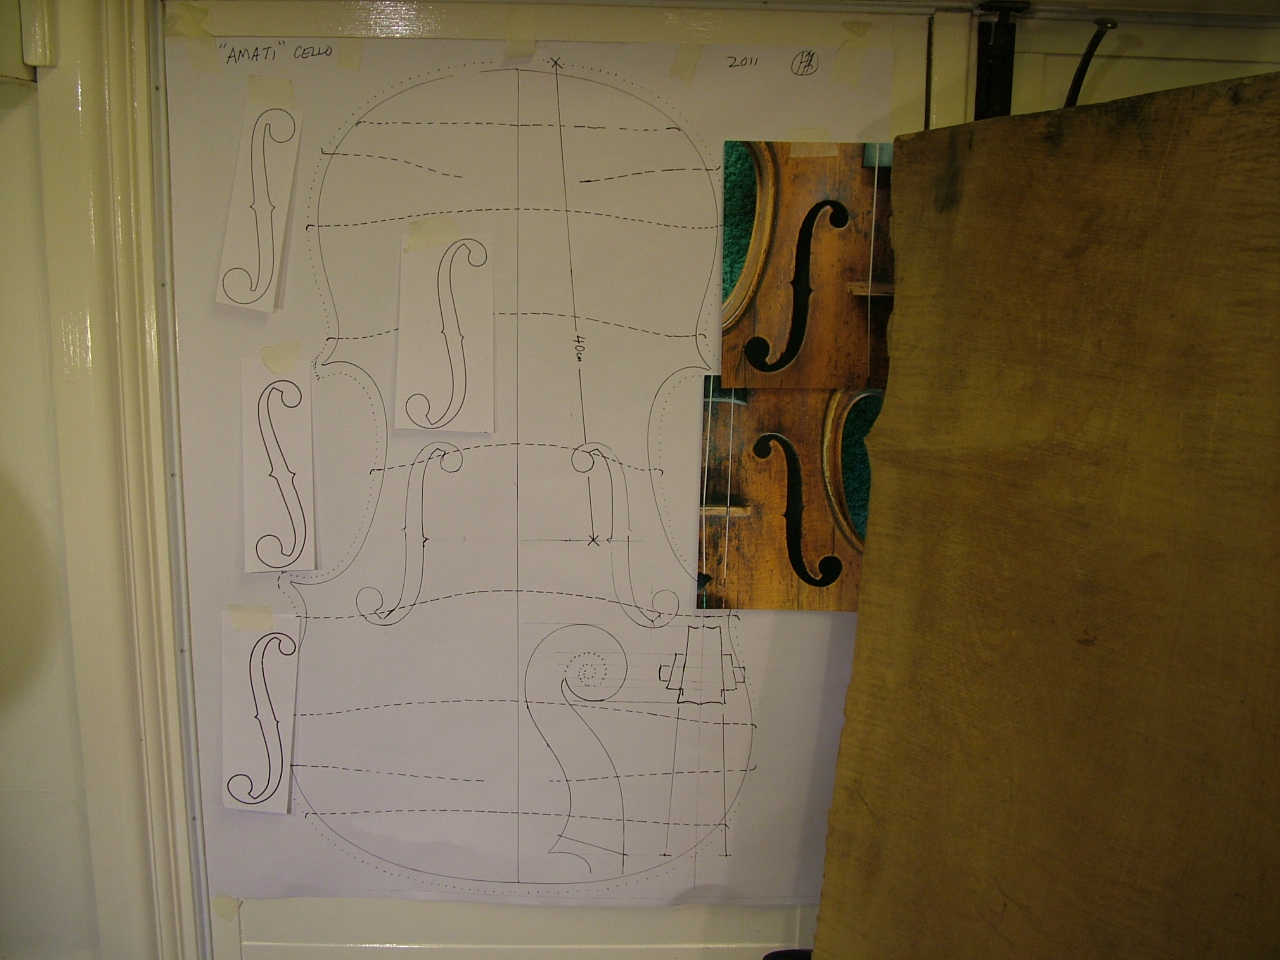
Experimental 'Amati' Cello
A number of people have remarked that the Amati Bros. Viola (Gallery 1) might make an interesting Cello. As a long term project I am attempting to design and make this instrument, retaining the basic geometry. Part of the intitial aesthetic will be to use a very old, plain slab-cut back, with superb visual character.
Varnish Trial - 2010
Varnish on Test Strips never looks the same on instruments. 'Trade' instruments finished with prototype Italianate ground and madder varnishes based on C18th & C19th violins from Cremona, Milan and Turin.
Available in August 2010 from
Sheffield Music Shop
e-mail:
sheffieldmusicshop@btconnect.com
tel:
01142-611111
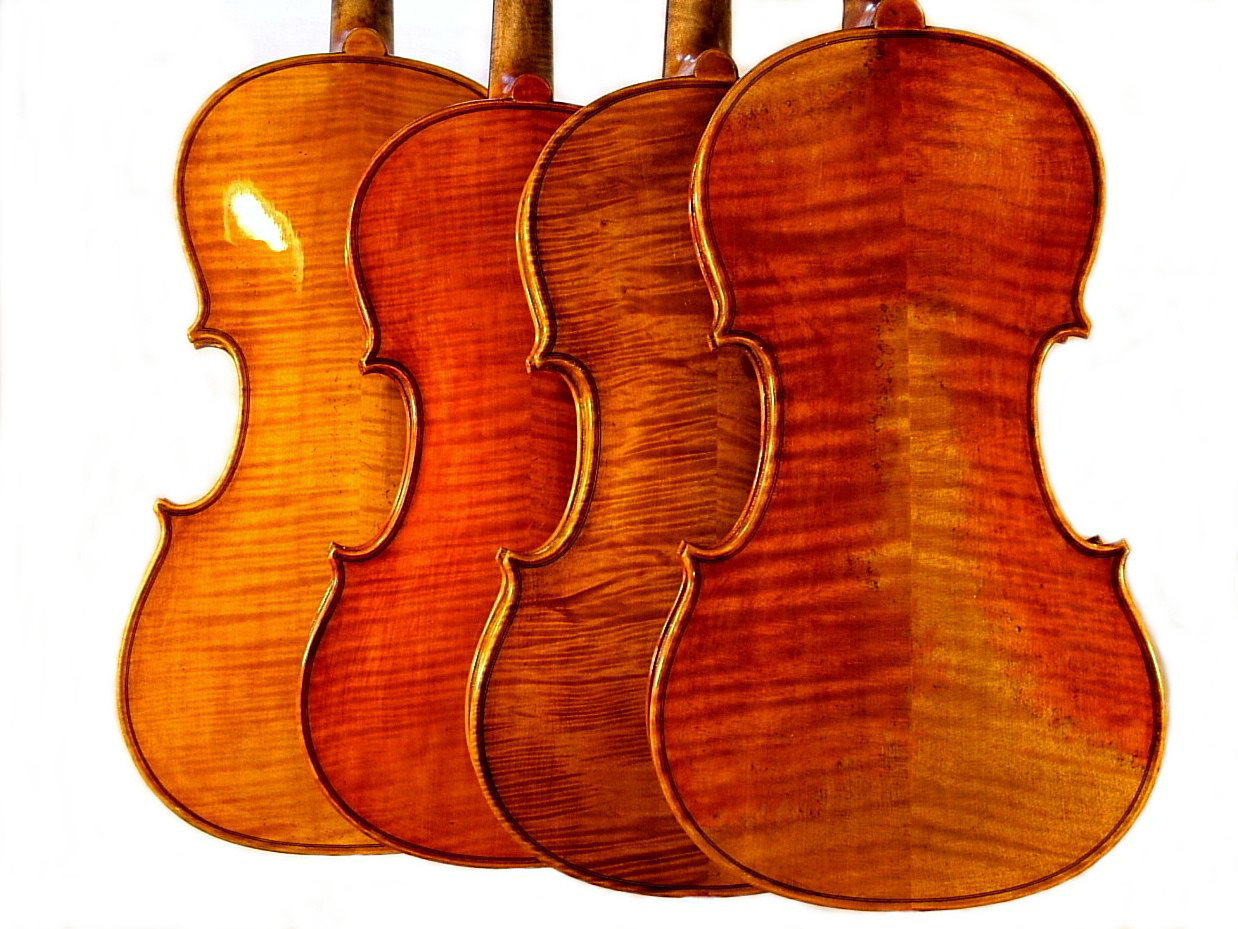
When I arranged these varnish experiments with Ian I was not expecting the beautiful range, depth of colour or, indeed, some of the interesting finishes'.
Stephen Basford - 2010
Sheffield Music Shop
~~~~~~~~
G. B. Guadagnini Violin - 1774 Model
The client chose this model for its elegant outline and longer length (356mm).
The very old back board was selected for its character and was slightly narrow requiring the addition of 'wings'.
The front, which is also old, has a slightly narrow grain and superb resonance.
Fig. 1: Fig. 2:


Fig. 3 Fig. 4:


Fig. 5: Fig. 6:


Fig. 7: Fig. 8:


Fig. 9:

Varnishing the Violin


